|
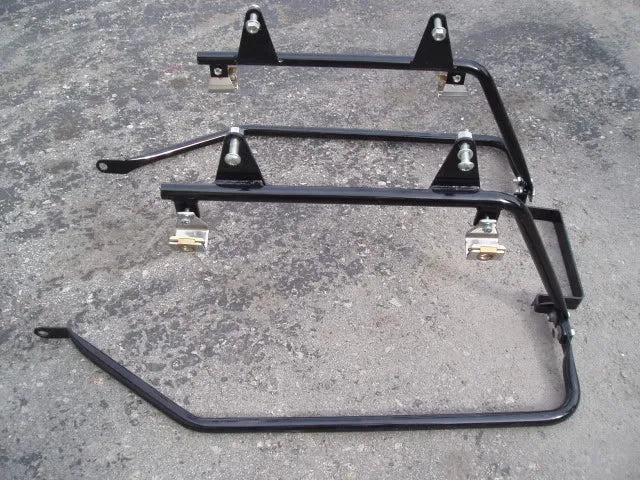
This kit has been modified from it's original application to facilitate the installation of the Bad Dad's Stretched Saddlebags and the one of Bad Dad's custom rear fenders onto the Harley Davidson Softail ® platform. The addition of any Stretched Saddlebags WILL likely require an alternative turn signal arrangement (not included). On applications where Bad Dad's Softail Fender Cover will not be used, the rear turn signals will still need to be removed from struts and on EVO FLSTC®, turn signal bar will need to be relocated. This kit may not work with rear axle covers. This Bracket Kit will work with rigid or quick release sissy bar side plates. Bad Dad's Fender Cover will not work with sissy bar side plates. Bad Dad's Summit Fender will work with sissy bar side plates.. Note: (1) This kit does not include the Harley Davidson Rubber Isolators (P.N. 11464) (QTY 4) nor does it include the Harley Davidson Saddlebag Support Cushions (P.N. 90764-93) (QTY 4). These rubber parts must be used in order to obtain proper Saddlebag fitment. (2) Exhaust pipes must be lower than rear axle. (3) On 2008-Current Softail models, remove the rear axle and install from the opposite side of the bike. Add the 1 1/4" spacer between the inside of the frame and the lower bag rail on the left side. (4) Loctite everything. (5) Check tire clearance before riding. |
||||||||||||||||||
Parts List |
||||||||||||||||||
|
||||||||||||||||||
1) Begin by tearing down the rear end of the motorcycle. For our bike, we were also installing one of our Stretched Wide Rear Fenders, so we removed the seat, taillight assembly, and turn signals. If we were not installing one of our Rear Fenders, removal of the seat and taillight would not be necessary.


2) Next, install the upper saddlebag rails. These rails will bolt to the struts using the stock hardware. Install these upper rails on both sides of the motorcycle. Note: your upper rails may have a different shape than the rails depicted here. A recent upper rail design change has been made to offer a more rounded rail shape. This design change allows the upper rail to offer maximum drive belt clearance for lowered bikes utilizing aftermarket air ride systems.


3) Now you will install the lower saddlebag rails. Before doing this, you must first remove the rear passenger peg.


4) With the rear peg removed, install the lower rail behind the frame, and re-install the passenger peg. Install these lower rails on both sides of the motorcycle.


5) Next, we will install the rear bumper bracket in order to help brace the left side assembly to the right side. Bad Dad has designed this bracket to be adjustable. The adjustability of the bracket will aid you in achieving uniform gaps between your rear fender and saddlebags after all of your parts are installed. Your included bumper is preset to what Bad Dad believes to be the correct adjustment for your application; however, every bike has its own specific tolerances and your own installation can effect the way these tolerances ultimately stack up. Use our preset settings as a starting point and then adjust accordingly.
6) Here is a photo of the bumper installed correctly. Notice that the tab should be facing towards you. When installing this bumper bracket, you will be joining the upper saddlebag rails, the lower saddlebag rails, and the bumper bracket together. The brackets should be bolted together in this order, starting with the bracket closest to the front of the bike:
- Adjustable bumper bracket
- Lower saddlebag rail
- Spacers
- Upper saddlebag rail


7) Now you can install the four (4) "S" or "U" hooks onto the upper saddlebag rails. Here is a photo of the hooks installed. The correct hooks have been supplied for your application.
These photos depict the hooks after they have been installed.


8) Next, set the saddlebags onto the lower saddlebag rail, and use the bail head studs and washers to pin the saddlebags to the upper saddlebag rail.

9) The saddlebags are now installed on the motorcycle. Again, be sure to make sure all of your bolts are tightened and they you have appropriate clearances before riding.


10) Finished assembly using Bad Dad’s Extended Saddle Bags and Softail Rear Fender.


